Apr 10, 2010

Earth Day is right around the corner and I wanted to do some things to make the day more special. We were working on the letter B this week so I thought it'd be fun to make a Pine cone Bird Feeder.

Living in Las Vegas makes finding pine cones a little harder then when I lived in Seattle! All three girls and I set out to find some regardless. We found tons of neat nature things to put in the bottom of Little Misses stroller. By the time we got back to the house I had 12 pine cones, a small bucket full of dandelions, several rocks, and a couple cherry blossoms.

They were happy to take a nap after we got home so I set all the goodies out in our backyard in hopes in bugs would wonder out and off our nature findings. I don't want to trap some poor spider in his home with peanut butter!

Once the ladies all awoke from slumber we started our craft:

How to make a Pinecone Bird FeederPinecone Bird Feeder Earth Day craft Letter B craft Familyfun Magazine CraftHave all your supplies ready:
Pinecone
Birdseed *I bought ours at the Dollar Store
Yarn
Scissors
Creamy Peanut Butter
Shallow Bowl
Cookie Sheet

I set out a cookie sheet so both my girls could cover the pinecone with peanutbutter easily. We did this outside on the grass which would have made a mess without the cookie sheet.

Using your shallow bowl, fill with bird seeds. Let your child(ren) roll the pine cone in the seeds. GG thought she's lick some peanut butter of her fingers and was very upset with the amount of bird seeds now stuck in her teeth! It took a couple flushings before she was satisfied they were all gone. *I used a fresh jar of peanutbutter only to realize half way through: Eew, they are dipping a spoon several times into a fresh jar of peanut butter and smearing it onto a dirty pinecone. Not the best plan. Next time I'll put some in a tupperware container for them!

Cut off some string, I made ours 2 feet long to give me plenty of string to tie. Wrap the string around the top of the pinecone, then to a tree branch. All done! This took us from start to finish 15 minutes.


Apr 8, 2010

Hand and Foot Print Flowers for Spring!
Handprint Flowers Foot Print craft Mothers Day keepsake Spring playdate
Finished Project

These are super easy to do, I was even able to get both of my 3 year olds hands and feet onto the SAME piece of paper! Granted it was a large piece of construction paper, but they fit none the less. I had to settle for a new piece of paper to get my 11month olds flowers done but that eased my fears of her turning her flowers into a finger painting project which would "ruin" the twins prints.

Hand Print Flower Footprint art Mothers Day gift from kids Toddler painting
8-Oz. Color Splash! Washable Tempera Paint (Pack of 12)Baby Handprint Footprint Keepsake Using Washable Tempura Paints make this project an easy one to clean up after.

Supplies:
Washable Tempura Paints
Paint brushes
Wipes or a wet hand towel
Paper to apply prints onto

Step 1: Choose your colors for the flowers, my girls actually chose different colors! I thought we'd have our usual purple and pink but they surprised me and I think they turned out great! Place your hand and foot prints as shown. I use regular baby wipes to clean off the paint but a wash rag would be far more economical.


Step 2: Draw in your stems. I used a regular foam paint brush. I buy mine at Michaels but have seen them at Target and Walmart. Make sure to wash these out ASAP, even just soaking them will make them last longer. They may be cheap to buy but having to run to the store Just to buy paint brushes aren't in my plans for the day.
11month old's project

Step 3: Paint on leaves and add the name and date to either a stem or on an empty part of the paper.

Apr 4, 2010

Handpainted Glass Baby Bottles

These are super easy to make!  I've been trying to find fun BPA free baby bottles and have yet to find any.  So, I made my own.  I bought a 3 pack of glass baby bottles - Evenflo Classic Glass Bottle 4 oz, 6-Pack $11.99

Since the bottles are not smoothly round but have more of an octagon shape, its very hard to use the actual paint.  I decided on using the Vitera Paint Markers which are dishwasher safe after being put in an over at 250 degrees.  *Follow the instructions on the pen to be exact!  I also used the Vitera 150 paint for the butterflies, ladybug, and flowers.

If you'd prefer not to do this free hand, which being a horrible artist myself I couldn't bare to even try it, then sketch it out first. 

Step 1: On a paper cut to the exact size of the bottle draw out your design.  While drawing keep in mind that your pen or pencil draws a much thinner line then the paint markers.

Step 2: Place your design template into the botte and fill with rice, beans, or cherios!  The idea is to keep your paper from moving about while you draw.

Step 3: Begin to draw.  Have a wet rag on hand to clean up any mistakes or sharpen any lines.  You have a grace period while the paint is wet, once it dried its nearly impossible to clean up!  Though it is possible.

Step 4: Once your satisfied with your design, remove the filler and paper.  Place the bottle ONLY into a cold oven.  Set your oven to 250 degrees for 15 minutes.  Remove after the oven has cooled down.  Most importantly, follow the instructions that comes with the paint - these are the instruction I recieved with the kit I bought.

Step 5: Wash in your dishwasher on the top rack.


You can have some fun with the design knowing the background will be white, at least for the first year! 

I've made several for babyshowers as well, they've been a huge hit everytime.  Once you have your template created, the actual drawing takes little time.


I also painted some baby food jars.  I use them for collecting little art supplies like scraps of tissue paper from past crafts or jewels that fall off projects just begging to be used again.


Mar 30, 2010

Cothespin Butterfly Crafts

Clothespin Butterfly Craft
Butterfly Clothespin craft for toddlers Letter B craft
This is a fun, easy, and educational craft for your little one! We did this craft as we learned about the Letter B. As we put it all together we talked about how pretty butterflies are, the stages they go threw to become butterflies, and of course the sound B makes! Somehow both girls already knew the Spanish word for butterfly, mariposa! We also learned how to sign butterfly in ASL.
Butterfly Clothes pin supplies
Supplies:
*You can also decorate with glitter glue, crayons, markers, etc...
Pre-cut the wing squares - Cut a strip 6 inches long and 4 inches tall then fold in half. Draw a B on one side for your child to cut out. *Always supervise your child around scissors.
Cut the pipe cleaner to 6 inches.
After your clothespin is dry from decorating, take the B that has been cut out and place into the clothespins mouth as seen in the picture.
Take the pipe cleaner and bend in half then place where the wings are, curl the ends to become antenna.
Apply googly eyes and draw on a smile - Done!

Mar 25, 2010

Toilet Paper Roll Binoculars

Letter B binocular kids craft bug safari

This is a super easy craft and the kids go buggy over it! I've been collecting toilet paper rolls since December - needless to say, we have a ton. So its time to start working with them. BB and Gigi had finished putting on and taking off most of their princess dresses so it was time to sit down to a craft.

Today we are working on The Letter B so I thought it'd be fun to go on a Bug Safari!

Supplies:
*2 toilet paper rolls (or one paper towel roll cut in half)
*Crayons, markers, glitter, stickers, jewels - whatever your little one likes to decorate with
*Colored paper to cover the rolls with, if you'd like
*Hole Punch
*Yarn
*Tape or school glue


Set up your little one with the 2 rolls and let them decorate! *If using glitter I suggest placing a baking sheet underneath to help the containment of glitter. I'm positive I'll have glitter in my carpet for many, many years regardless!

Gigi working hard on her craftEasy Kids Crafts Blog Twins Gigi and BeBe crafting!Once they are satisfied with their artwork, tape or glue the rolls together. Punch a hole into the outside of the tubes and tie your yarn to make a necklace.

Now the fun starts, hide several plastic bugs in your home or backyard and have them find them! Definitely count how many your hiding - I've found lizards in my playroom in odd places weeks after this game.


I bought some butterfly nets at the Dollar Store to help with the collection of bugs. They collect just about anything they can fit into those nets at least once a day!

Mar 20, 2010

Rain Art

It doesn't rain very often in Vegas, but when it does I try to take advantage of it! We spent our morning splashing in small mud puddles and digging for worms in our "garden" so it was time to head indoors for a craft.

We colored the paper with washable markers:
mommy and me rain art craft for kids on a rainy dayThen put them outside to watch the rain distort the drawings. Of course being Vegas the rain wasn't the type I'm used to being from Seattle! I ended up giving them water bottles to help the process along.
rain art for mommy and me easy crafts for toddlers


Mar 12, 2010

Lil' Chef's Pizza Playdate

Calling all Little Chefs! Its time to make it the way YOU want it...and eat some toppings along the way.

Pizza Playdate for kids mommy and me little chef crafts These are easy to prepair for your kids and fun for them to make. We used english muffins for this playdate but you can also buy biscuits in the frigeration section of the grocery store (Pilsbury Dough in the container kind) and let the kids roll them out. I washed our Playdough rolling pins and let the kids use those to roll out the dough!

Have enough containers for each kiddo and come to the realization that double dipping is not only allowed but accepted between toddlers.
Posted by Picasa


Mar 5, 2010

Lil Chef's baking Rainbow & Tie Dye Cupcakes!


These cupcakes take some time to put together, but they are Well Worth the effort! The more you have set up to go, the easier it is to have fun with your kids while baking.

Step 1:
Get all your ingredients and cookware together
Playgroups playdates little chefs rainbow cupcakes cooking with kids Step 2:
Pre-measure your liquids for easy pouring by your child. I have my girls crack the eggs for me too. A girlfriend of mine has boy twins who is far more brave then I ever planned on being...she had me showing the girls how to crack eggs at 18months. Always have a wet rag nearby to clean up raw eggs on your childs hands or take them directly to the sink for washing.

Playgroups playdates little chefs rainbow cupcakes cooking with kids Step 3:
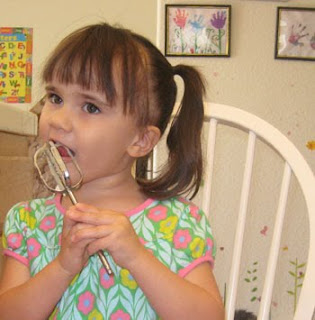
Although not healthy, I do let my girls lick the beaters. You can squash any fears of salmonella by just using egg whites if you so choose.

Rainbow Cupcakes Mommy and Me cooking craftsStep 4:
Die your cake mix. Although I used White Cake mix, the batter is more of an off white. This does effect how you create vibrant colors. I followed the directions on the box of food coloring and it worked great. I was fearful the cupcakes would have that food dye flavor, but they didn't!


Playgroups playdates little chefs rainbow cupcakes cooking with kids Step 5:
Line your muffin tins with the paper inserts. I decided against it for this batch and I didn't get the rainbow effect on the outside of the cupcake. With the paper inserts you can see the color layers, even the paper you peel off looks cool!

Step 6:
Begin layering your colors in reverse: purple, blue, green, yellow, orange, red. Keeping in mind you'll have 6 layers, try to keep them as thin as possible. I used a plastic spoon to help spread it out.

Step 7:
Cook as directed on the box. Let fully cool.

Step 8:
Using white cake frosting in separate bowls create as many colors as you'd like to offer your child to decorate with. Or you can use all white to signify a fluffy cloud.

Playgroups playdates little chefs rainbow cupcakes cooking with kids
Of course colors is what this is all about so I offered the twins 5 colors!
Playgroups playdates little chefs rainbow cupcakes cooking with kids
I cut one in half to show the effect.
Playgroups playdates little chefs rainbow cupcakes cooking with kids

For the left over batter I mixed them in the muffin tins to see if I could get a tie dye effect, I think they turned out great!

This is a time consuming baking craft, but I think it was well worth it and we had fun the entire time. Plus if you get bored layering it all, just mix them together and have tie dye cupcakes instead!


We made these before St. Patricks Day to cook rainbows. We learned the ASL sign for each color and how to sign rainbow itself. The girls also learned what happens when you combine colors as they slathered on the colored frostings - at the end they were eating brown/black cupcakes!


Mar 1, 2010

Hand Print Lantern Keepsake Fun Mommy and Me Craft
I have to admit, I go a bit crazy for Spring. The weather here in Vegas is Perfect! We bought these plain white lanterns at Michael's, they have little battery operated lights inside with an extra light bulb. Target sells them as well.

I was able to get all 3 girls hand prints onto this but was unable to get a photo showing it. I really can't do every one's hand prints on regular paper anymore so I find other things to put them on!

I used regular washable tempura paint by Crayola and painted on the stem and leave myself. Since I'm hanging this in the playhouse outside I also dabbed glow in the dark paint all around so it looks like stars once turned off. The girls LOVE it on and off!

None of this is water proof so I do take it in every night for fear rain will ruin this keepsake.

Wordless Wednesday - Painting with my 10 month old!

I may be a bit of a neat freak at times, but after my twins went through learning the joys of squishy paint, I've decided to save some time and put my Under 1 in the bath tub!  She loved it!  I was able to give her a bath straight afterwards minus the "Please don't touch the walls" chant as I run down the hall to the bathroom.  It was very relaxing and fun.

*Being Under 1 she of course was more then happy to taste test all the colors. I had a wet wash towel on hand to get to her mouth before her hand did...it was successful most of the time!


I used regular washable tempura paint by Crayola, we use it for just about everything. I started with her in the tub so she could see me put the paint in front of her. At first she looked at me like I was nuts, then she dove right in! Being washable paint it was extremely easy to wash off the walls, tile, and anything else she touched.

Feb 20, 2010

Chinese New Year Paper Lanterns

Celebrate the Chinese New Year with an easy craft with your kids!
Easy Kids Crafts Chinese New Year Lantern for kids
Use regular construction paper. Let your child decorate the lantern with stickers, glitter glue, crayons, and pens. When using loose glitter, I put a cookie sheet under the sheet then let them spread washable glue over the paper with popsicle sticks. I let them pour their own glitter then we shake it out while still on the cookie sheet after its dried. I still have a never ending supply of rainbow glitter in my carpet, but I'm sure this helps!

Decorate your Chinese LanternSince my girls LOVE glitter and glitter glue we had to let our paper dry for 24 hours. Fold the paper length wise in half. If your kids are ready to use safety scissors then let them cut slits in the paper. I sit with them, never leave a child unattended with scissors, to make sure they're keeping on track. I like their projects to look like a kid made them so there are several diagonal cuts here and there.


Twins using scissors for their Lantern

The girls had a blast and we have them on our fireplace mantel. Enjoy!

Feb 6, 2010

Letter H Playdate and Valentines Day Craft - Part 2

We enjoyed making the hand print hearts so much that we did a couple more to hang on our craft wall! For the glitter heart my youngest daughters hand were too small to show real definition so I just did the twins hands.

HOW TO: Trace your childs hands into the heart shape shown in the picture. Use glue, I used regular Elmers School Glue for this, and thinly spread over the fingers. Put the paper on a cookie sheet and let them dump the glitter onto the paper. My girls LOVED this part! No need to be careful here, let it go all over! Once dried, tap the paper onto the cookie sheet to get any access glitter off. Pour the unused glitter back into the container.


I've whited out my kids names on the photos but wanted you to see where I placed their names so you can choose where to place yours. This craft was easy too. Basically the same as the Letter H page but I used decorative cutting sheers to make the pink heart stand out a bit.
Either of these would be great for grandparents or moms!

Feb 5, 2010

Letter H Playdate and Valentines Day Craft

Hand print heart Valentines day Letter H


We actually made this craft during a Letter of the Week playdate but I hung them up during February as well. We made different heart hand print crafts to give to the grandparents, I'll post those next.

Using red washable tempura paint, paint the palms of your childs hands. I do one at a time to cut down on the mess.

Place their hands as seen in the photo. Outline the prints with a red marker or a glitter pen.

Please visit my blog Playdates and Playgroups for more ideas to present this to your playgroup!
Related Posts with Thumbnails